Well, not everything works out. The travertine tiles all but disintegrated in the first attempt to get the oven above 500. Fortunately the stone that came with the oven fared much better, so for now it is our main cooking surface. We have located a local source for medium duty fire brick which according to the Forno Bravo website, is the correct brick for a pizza oven. Here in part, is their justification:
“Medium duty firebrick: This is the brick that we recommend for both the cooking floor and dome of the Pompeii oven. medium duty firebricks are comprised of roughly 35% alumina and 50% silica, heat up quickly, easily withstand the 900F heat your oven will reach, and are designed for the rapid heat-up and cool down (thermal cycling) that your oven will experience. Firebrick will also reach the heat required for pizza more quickly than clay brick, as they are more efficient at conducting heat.”
The Tuscan Oven manual calls for the pizza stone to sit atop the lowest rack which also has a ring of flat metal to disburse the heat from the burner directly below. Others have pointed out that this arrangement burns the bottom of the pizza before the top cooks because this setup overheats the stone-as it did with our travertine tiles. So following their advice for now we removed the top rack and placed the stone on the lower rack, which puts it in the lower/middle part of the oven. While this does not eliminate the thermal bounce that putting an uncooked pizza on the stone (too thin to retain much heat) it will at least give us proof of concept until I can pick up the fire bricks this week.
So lets make some pizza! We started with store-bought dough which we know isn’t the best thing to do, but its small steps for now. After watching a how-to on stretching dough we realized that we are babes in the woods, so to speak. It’s not so simple-you don’t just tug it into shape ’cause it just don’t stay there!
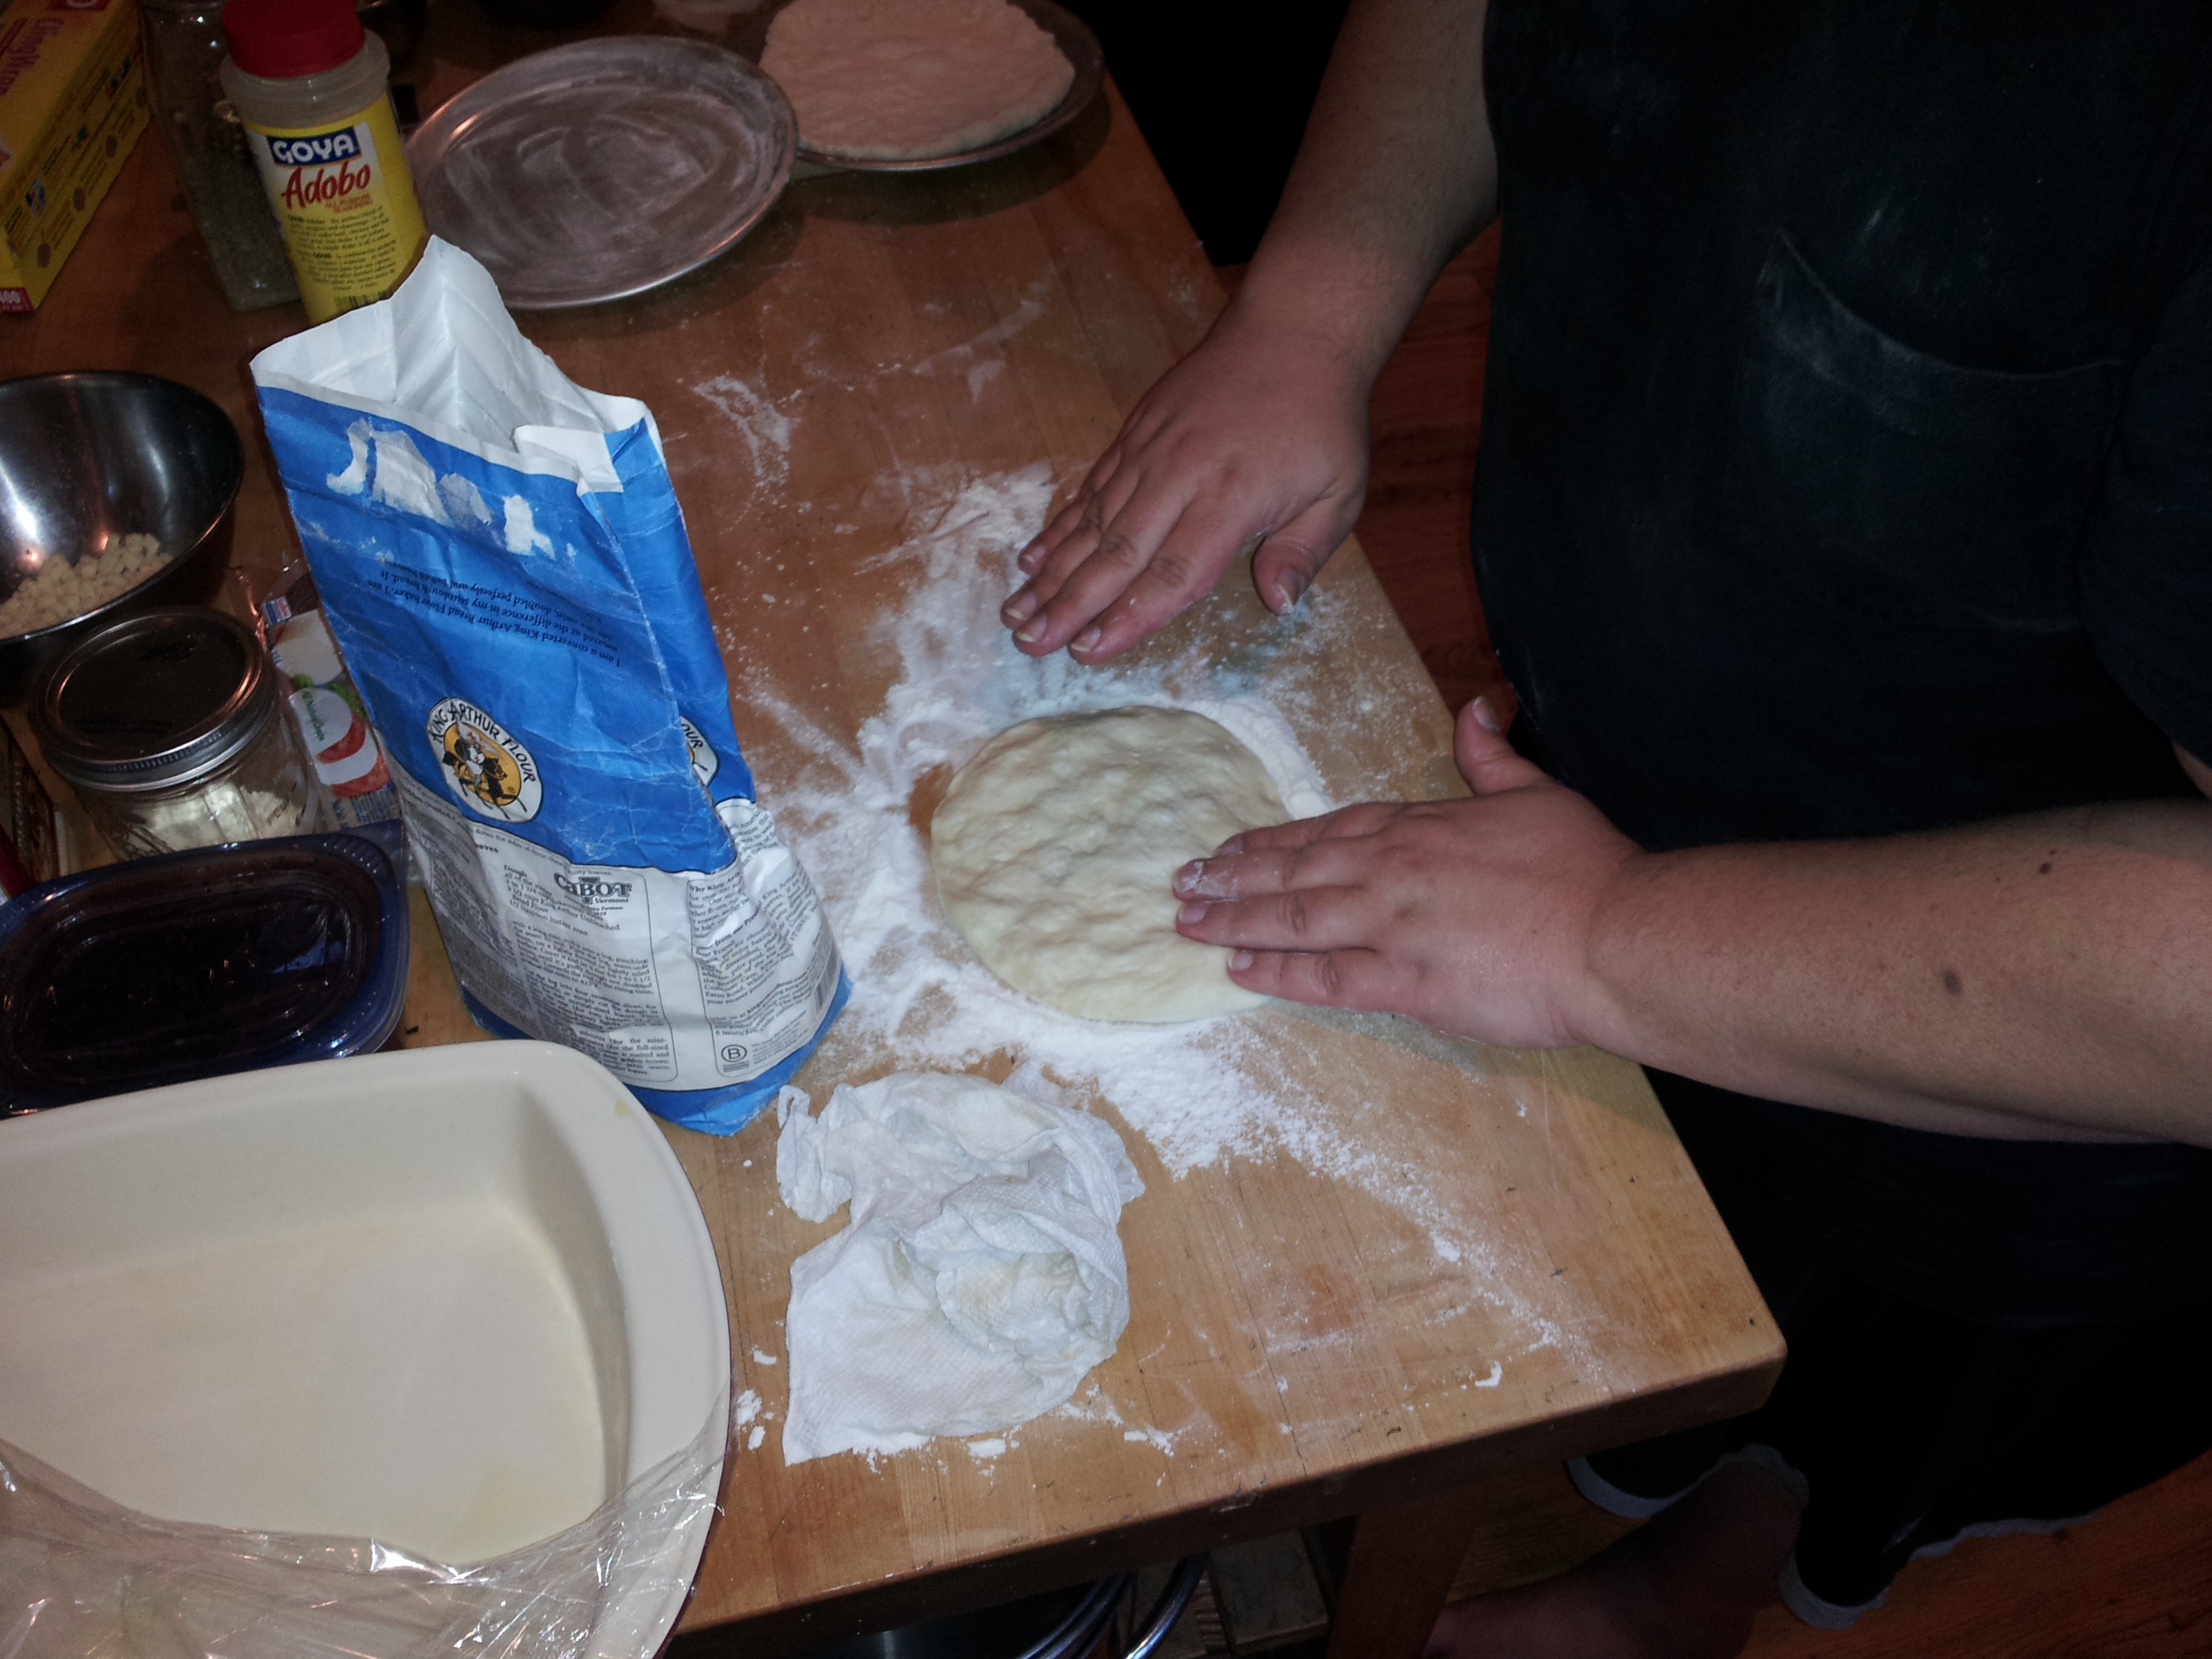
We watched and learned the “bongo drums” and the “DJ” moves, all designed to coax the pizza into a somewhat circular shape that actually stays somewhat circular. Our first pizzas comprised of an attempt at a classic Pizza Margherita, which is dough, red sauce and mozzarella, topped with basil at the end. The pizza sauce (at least) was home made from a simple recipe that I found a while back which yields a nice, fresh-tasting sauce that everyone seems to like. The second pizzas-the dough ball yielded enough dough for four 8″ pizzas-were a bit more adventurous. Using some nice BBQ pulled pork (my other outdoor cooking passion) and a bit of the red sauce mixed with a hint of BBQ sauce, we made two pizzas topped with the pulled pork, provolone and parmigiano cheeses, and in my case, a bit of sauteed broccoli rabe, left over from a previous night’s Cuban sandwiches. Dean is not so big on the rabe, but hey, taste buds grow with time.
Surprisingly, the oven came to temp in less than thirty minutes. Using a thermal infrared temperature gun, I registered the temperature of the ceiling at well over 650 and the stone at 630. These should be reasonable temps for a first endeavor. The damper in the chimney and the insulation in the walls certainly play their parts perfectly. The external oven roof hovered around 120-140 in the coolest sections with only the areas by the door and the chimney itself reaching temps above 200.
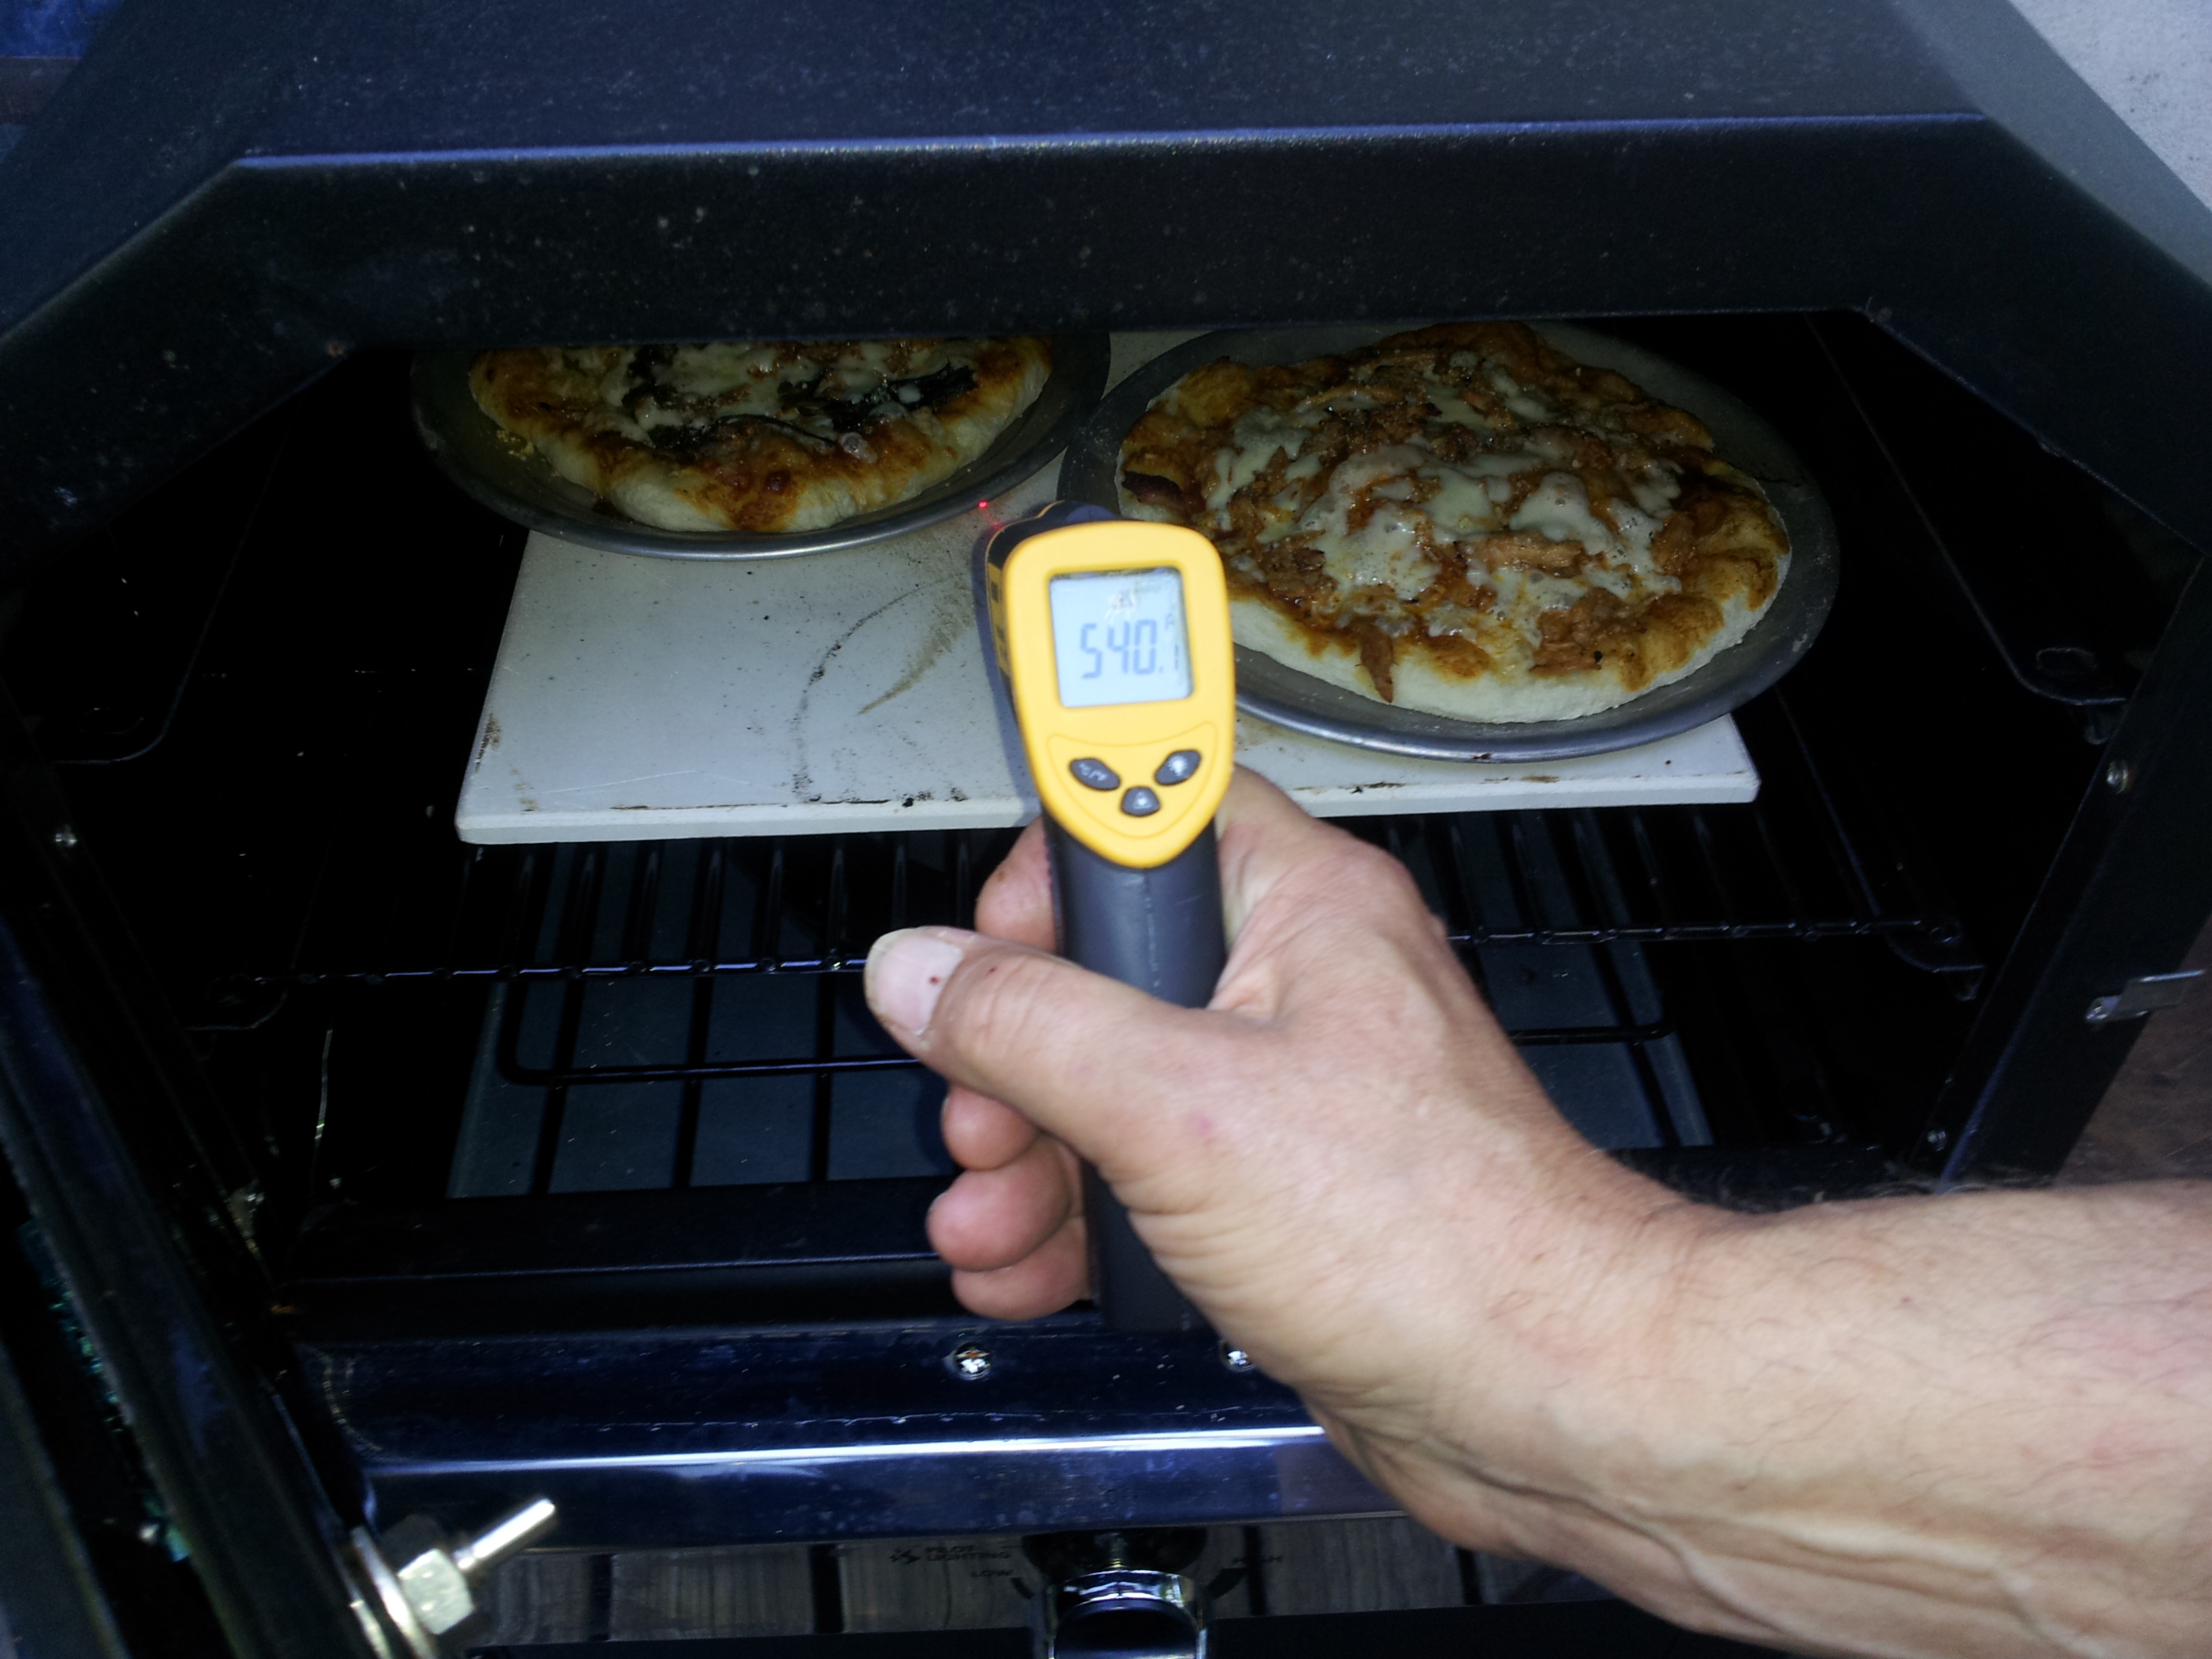
Naturally the stone would not stay at its temp once topped with pizzas, but subsequent readings shortly after the pizzas went in do show that it bounced back up to 534 rather quickly and held there. As far as cooking time, the pizzas took about 6-8 minutes (we weren’t really timing them) to get to a nice golden crust with a bubbly top. For ease of handling (and because we were out of corn meal for the peel) we decided to use the small pizza pans that I had picked up from a local restaurant supply house along with Emma, several years back.

They actually worked quite well, yielding a nice crispy bottom and made getting the pizzas in and out of the oven quite easy. Also, they made for dressing and transporting the raw pizzas easy, so we may just continue this way for the times that we have lots of people over.
And how did our maiden voyage pizzas turn out? Very tasty, given the store bought dough. Why the caveat? Well, store bought dough-in this case from our local Shop Rite-is a bit on the “robust” side and yields a rather chewy crust. We are looking for that light, airy and crispy crust which is so synonymous with Neapolitan pizza and that only comes with the right dough. So for now, we’ll call this experiment a success and with a few mods, our Tuscan Outdoor Oven a worthy addition to our cooking arsenal. Oh, and in case you would like to give it a try, here’s the pizza sauce recipe:
- One 6 oz can of tomato paste. Use a good brand-this is where your flavor comes from.
- 2 cups water.
- Adobo (our go-to salt) about 1/2 teaspoon, or to taste.
- Four (or more, to taste) cloves of fresh garlic, chopped very fine.
- 1/2 cup extra virgin olive oil-again the ingredient is all, so use a good one.
- Italian spices, one tablespoon or more, to taste. I just use a marjoram, rosemary, sage, basil, oregano and thyme mixture from McCormick. I know, it’s cheating, but it works.
Whisk all of that together and let it meld in the refrigerator overnight for best results, but if you are in a hurry (as we were) it can be used right away. Enjoy!
